I recently saw this super cute bracelet courtesy of Pinterest
Someone made cute little rosette's and attached them to a piece of cut ribbon.
You need a piece of ribbon long enough to tie around your wrist in a bow.
You can pick any color and fabric that you want.
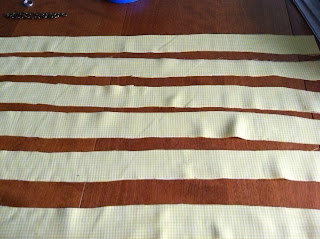
You need about half a yard of fabric. More if you want bigger rosettes than mine.
Cut into 1.5 inch strips.
you need about 5 or 6 rosette depending on the size of your wrist
Take cut strips and twist until entire strip is wrap/twisted
Then you can tie a baby know in the end and start winding the rest of the strip around the knot
Then you can tie a baby know in the end and start winding the rest of the strip around the knot
Its easiest to keep flower on the table so it keeps its shape
Then after it is done...glue end of string to side of flower.
To hold flower together...hot glue the back of the flower to a piece of felt.
Then line up flowers on the ribbon...you want them tight together.
Hot glue flowers into place on your Ribbon
Ta-da
I dont think this picture does the bracelet justice but they turned out so cute!
I'm going to make more in extra colors :)
I made this one too!
We also stained our neck. It was way overdue....check it out!
Thats the hubs walking away from the picture!
Also a bit REDIC! I saw a christmas tree this weekend at Home Depot...WTF?
It was only Oct 8th?
Happy Crafting Tuesday!


9 comments:
These all look awesome, I'm going to have to try them out sometime! I love xmas, but it's wayyyyy too early for those to be out!
fun fun!
you and nicole are just so crafty!! love both braclets!
Those bracelets look adorable!!
Happy Tuesday,
Simplycamylla.blogspot.com
i love that rosette necklace seriously what a great DIY thanks for sharing. you are very crafty
Love the bracelet! And the deck looks great! :)
that looks totally amazing! way to go!
What a cute bracelet. I might have to make one of my own!
xo
DVR viewing gives the biggest challenge on Watch Full hd Movies Online For Free - WatchSeries.
Post a Comment